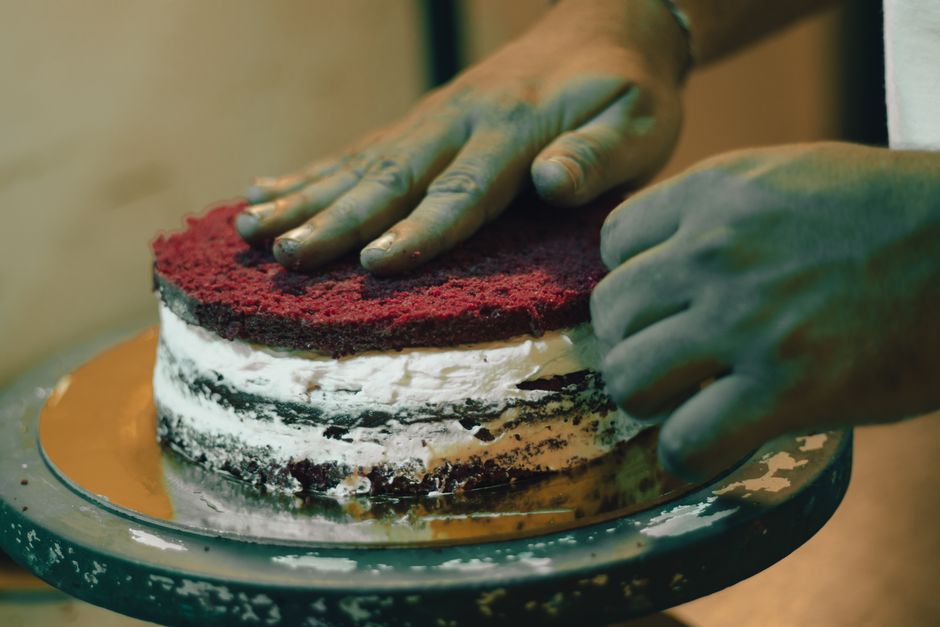
Red Velvet Cake Recipe That Actually Earns the Drama
To make red velvet cake, combine cocoa, buttermilk, red food coloring, and a touch of vinegar for its signature color and tang, then bake two layers at 350°F for 30–35 minutes. Frost with classic cream cheese frosting once completely cooled.
I made red velvet cake for a Valentine's Day dinner I was cooking for someone I had been seeing for about four months. I chose it because it's visually dramatic in a way that communicates effort without requiring me to explain that it was actually not that difficult to make, which is the sweet spot for romantic cooking. The cake arrived at the table looking correct. The frosting was slightly warm and starting to slide.
I had not let the cake layers cool completely before frosting, which is the mistake that every baking guide warns you about and which I had decided to skip because I was running close on time. Warm cake melts cream cheese frosting from below. The frosting slides toward the edges and eventually off the sides of the cake in a way that is noticeable by candlelight. I presented it anyway. We ate it anyway. It tasted fine. The person I was cooking for was gracious about it.
Red velvet's flavor comes from the combination of buttermilk, vinegar, and a small amount of cocoa — the acid reacts with the cocoa and produces a mild, faintly chocolatey tang that's distinct from a standard chocolate cake. The red food coloring is not doing anything to the flavor; it's doing everything to the presentation, and if that matters to you, use enough of it to get a genuinely red cake rather than a brownish-maroon one. Two tablespoons minimum.
Let the cakes cool completely. Wrap them, refrigerate an hour, then frost. Cold cake holds frosting. That's the entire lesson from the Valentine's Day dinner, and it was worth learning. The relationship didn't last. The recipe did.
Ingredients
- 2 ½ cups (315g) all-purpose flour
- 2 tablespoons unsweetened cocoa powder
- 1 teaspoon baking soda
- 1 teaspoon fine salt
- 1 cup (240ml) buttermilk, room temperature
- 1 tablespoon white vinegar
- 2 tablespoons red food coloring (liquid)
- 1 teaspoon pure vanilla extract
- 1 cup (225g) unsalted butter, room temperature
- 1 ¾ cups (350g) granulated sugar
- 2 large eggs, room temperature
- For the Cream Cheese Frosting:
- 16 oz (450g) full-fat cream cheese, room temperature
- 1 cup (225g) unsalted butter, room temperature
- 4 cups (480g) powdered sugar, sifted
- 2 teaspoons pure vanilla extract
- Pinch of fine salt
Instructions
- 1Preheat your oven to 350°F (175°C). Grease two 9-inch round cake pans, line the bottoms with parchment paper, then grease and flour the parchment.
- 2In a medium bowl, whisk together the flour, cocoa powder, baking soda, and salt. Set aside.
- 3In a small bowl or measuring cup, whisk together the buttermilk, white vinegar, red food coloring, and vanilla extract. The vinegar and buttermilk will react slightly —? this is correct and is the whole point.
- 4In a large bowl, beat the room-temperature butter and granulated sugar together with an electric mixer on medium-high speed for 4–5 minutes, until the mixture is pale, light, and fluffy. This step matters more than it seems —? do not rush it.
- 5Add the eggs one at a time, beating well after each addition and scraping down the bowl between additions.
- 6Reduce mixer speed to low. Add the dry ingredients and the buttermilk mixture in alternating additions —? begin and end with the flour mixture: flour, buttermilk, flour, buttermilk, flour. Mix only until just combined after each addition. Overmixing here will make the cake tough.
- 7Divide the batter evenly between the prepared pans. Smooth the tops with a spatula.
- 8Bake for 30–35 minutes, until a toothpick inserted in the center comes out clean and the edges are just pulling away from the sides of the pans. Begin checking at 28 minutes.
- 9Let the cakes cool in the pans for 10 minutes, then turn them out onto a wire rack. Remove the parchment paper. Cool completely —? fully, completely, not mostly —? before frosting. This takes at least 1 hour. Put them in the refrigerator if you're impatient.
- 10Make the frosting: Beat the cream cheese and butter together on medium-high speed for 3–4 minutes until smooth and fluffy. Add the sifted powdered sugar one cup at a time, mixing on low speed until incorporated, then increasing to medium. Add vanilla and salt. Beat until light and spreadable, about 2 more minutes.
- 11Place one cooled cake layer on a cake stand or plate. Spread a generous layer of frosting over the top. Place the second layer on top, flat side up. Frost the top and sides of the cake with the remaining frosting.
- 12Refrigerate for at least 30 minutes before slicing so the frosting can set and the layers hold together cleanly.
Pro Tips
- Room temperature ingredients are not negotiable. Cold butter won't cream properly, cold eggs can break the emulsion, and cold buttermilk slows everything down —? pull them out an hour before you start.
- Sift the powdered sugar for the frosting. I skipped this once and the frosting had lumps in it and I thought about it for two weeks.
- If you want to crumb-coat the cake (a thin first layer of frosting that seals in loose crumbs), refrigerate for 20 minutes after that layer before applying the final coat. It makes the outside of the cake look like you know what you're doing, which is its own kind of peace.
Substitutions
Storage Instructions
Store the frosted cake covered in the refrigerator for up to 5 days. Bring individual slices to room temperature for 20–30 minutes before serving for the best texture. Unfrosted cake layers can be wrapped tightly in plastic wrap and refrigerated for 3 days or frozen for up to 2 months.
Make Ahead
Bake the cake layers up to 2 days in advance. Wrap each cooled layer tightly in plastic wrap and refrigerate. The frosting can be made up to 3 days ahead and stored in an airtight container in the refrigerator —? let it come to room temperature and re-beat briefly before using. The fully assembled and frosted cake can be refrigerated overnight; the flavors actually improve by the next day.
Frequently Asked Questions
Why does red velvet cake need both vinegar and buttermilk?
Both the vinegar and buttermilk are acids that react with the baking soda to leaven the cake and tenderize the crumb. They also react slightly with the cocoa powder —? a chemical reaction that historically produced a natural reddish color in unprocessed cocoa before Dutch-process cocoa became standard. Today they still contribute tang, rise, and that signature tender texture that makes the name 'velvet' actually accurate.
Can I make red velvet cupcakes with this recipe?
Yes. Fill lined cupcake tins about two-thirds full and bake at 350°F for 18–22 minutes, until a toothpick comes out clean. This batter makes approximately 24 standard cupcakes. The frosting recipe is the right amount for a generously frosted batch. Do not overbake —? cupcakes dry out faster than layers and they will tell you about it in texture.
Why did my red velvet cake come out brown instead of red?
Most likely causes: not enough food coloring (use the full 2 tablespoons of liquid or 1–2 teaspoons of gel), using Dutch-process cocoa instead of natural unsweetened cocoa (Dutch-process is pH-neutralized and won't produce the same color reaction), or overmixing after adding the buttermilk mixture. Natural unsweetened cocoa is the correct choice here —? the label should say 'natural' or nothing at all.
Can I make this red velvet cake ahead of time for an event?
Absolutely. Bake the layers up to 2 days ahead, wrap tightly, and refrigerate. Make the frosting up to 3 days ahead and refrigerate. Assemble and frost the day before your event, then refrigerate the finished cake overnight. This actually works in your favor —? the layers settle, the flavors develop, and the whole cake slices more cleanly when it's had time to rest.
How do I store leftover red velvet cake?
Covered in the refrigerator for up to 5 days. Cream cheese frosting requires refrigeration —? do not leave this cake on the counter for more than 2 hours. For longer storage, freeze individual slices: wrap each in plastic wrap, then foil, and freeze for up to 2 months. Thaw in the refrigerator overnight. The cake texture holds up better than you'd expect from a frozen slice.
Can I make this recipe without food coloring?
You can. The cake will be a deep brownish-burgundy color from the cocoa and buttermilk reaction —? not red, but not bad-looking either. Some bakers use beet powder (start with 2 tablespoons) as a natural coloring alternative; it produces a muted earthy red and adds very little flavor at that quantity. The taste of the cake itself is unaffected by skipping the coloring entirely.
My cream cheese frosting is runny. What went wrong?
Two most common causes: the cream cheese or butter wasn't fully at room temperature (too warm makes it soupy), or you overmixed after adding the powdered sugar, which can break down the structure. Fix: refrigerate the frosting for 20–30 minutes, then beat again briefly. If it's still too soft, add powdered sugar a tablespoon at a time until it reaches a spreadable consistency.
Does it matter what kind of cocoa powder I use in red velvet cake?
Yes —? use natural unsweetened cocoa powder, not Dutch-process. Natural cocoa is acidic, which means it reacts with the baking soda for leavening and contributes to the classic color. Dutch-process cocoa has been treated to neutralize its acidity, which disrupts that reaction, dulls the red color, and can affect how the cake rises. The label should say 'natural' or list no alkali-processing. Hershey's regular cocoa powder is natural and works well.